
In this tutorial, we are going to Interface piezo buzzer or piezo speaker with Arduino UNO. A piezo buzzer is generally used to signal user in the form of tone or beep. This type of buzzer widely used in alarm, domestic gadgets or in embedded systems product to provide some kind of indication or alert.Buy designing a small circuit we can interface it easily with Arduino. We will design a small transistorized circuit and by providing high signal we can get a tone signal from the piezo buzzer.
Table of Contents
Hardware Required
- Arduino Uno
- Piezo Buzzer
- NPN Transistor BC548
- Resistor 1K ohm
- breadboard
Buzzer Arduino Connection
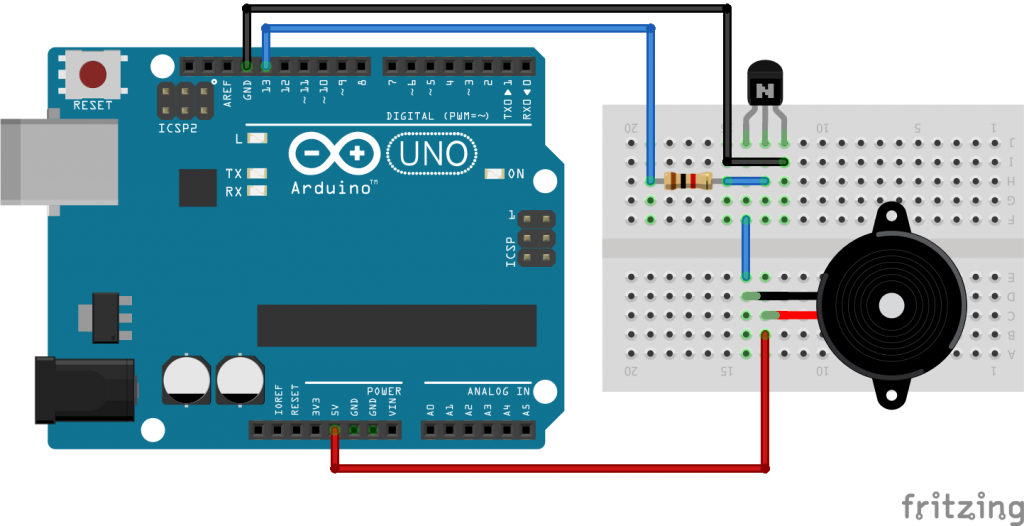
We are connecting the buzzer to the VCC and collector of the transistor BC548. Here transistor works as a switch and by applying high signal to its base triggers the buzzer to beep.
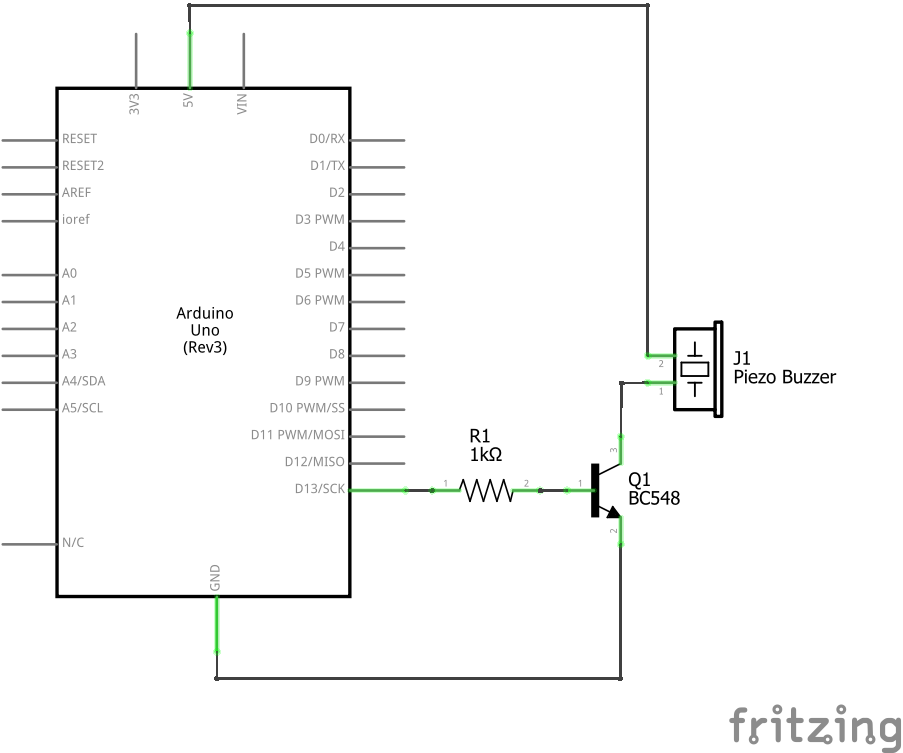
Buzzer Arduino Circuit
Buzzer Arduino Code
We simply need a high signal to the transistor base. For that, we use digitalWrite(13, HIGH). Once we are getting the signal high from the pin 13 piezo buzzer will produce sound beep till the signal is high. And by applying the digitalWrite(13, LOW), the buzzer will be off.
void setup() {             // the setup function runs once when you press reset or power the board
  pinMode(13, OUTPUT);     // initialize digital pin 13 as an output.
  digitalWrite(13, HIGH);  // turn the buzzer on (HIGH is the voltage level)
 }
